Papa’s Chicken Soup

DSC_0749.JPG

Happy New Year! Ok, so I haven’t posted anything since October…but I’ve been a *little* busy earning a Master’s degree and whatnot 😉

The last few months have been overwhelming but wonderful. Eric and I moved out of the farm a few weeks ago and said a bittersweet goodbye to the beautiful mountains of North Carolina as we put our things in storage and began the next part of our journey. In a few days we leave for Nicaragua for anniversary celebrations, and then Eric will begin his final clinical rotation and I will [hopefully] find the hospital job I’ve been looking for!

img_0112

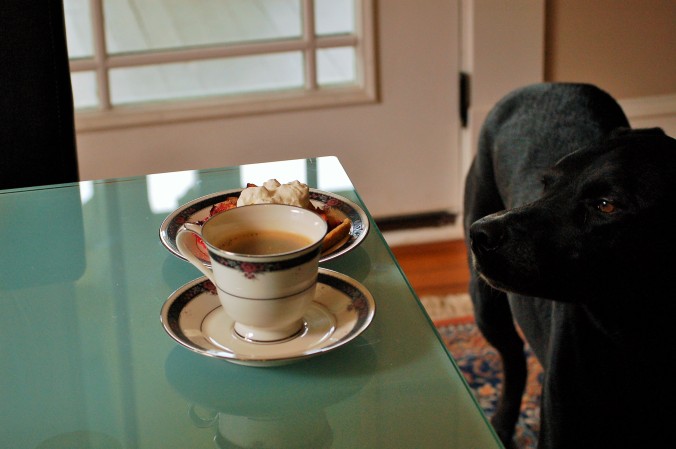
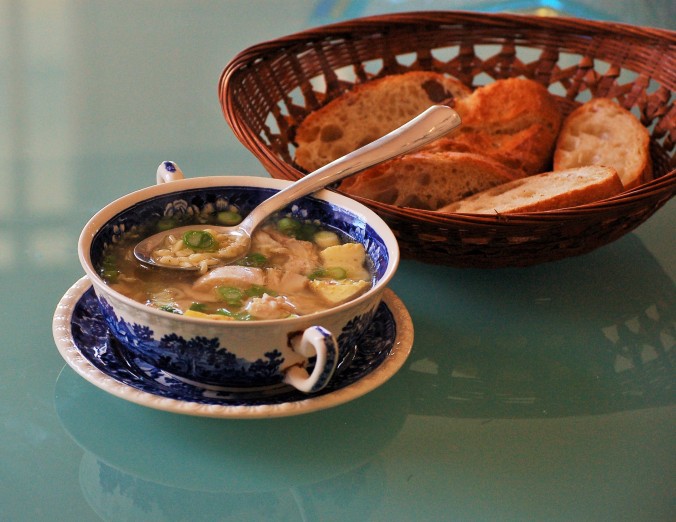
When you’ve been moving a mile a minute and there is so much stress and big life events all at one time, sometimes the body keeps up with you just until all the dust settles. And that’s where I find myself now— sick with a nasty cold and cuddled up with the dog on the couch. Luckily, we have a family recipe that is proven to make you feel better. And nothing makes me feel better on this first day of the new year than a cleansing bowl of German-style chicken soup, which my dad has perfected.

DSC_0747

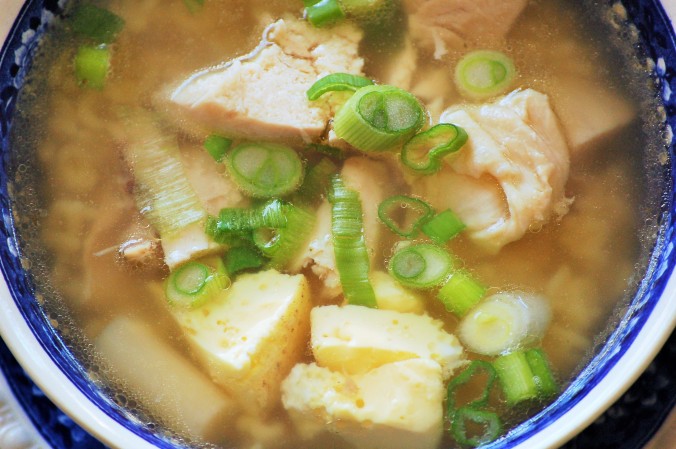
This isn’t your ordinary chicken soup. It has some unique ingredients, one of the most important being the Eierstich:

img_0117

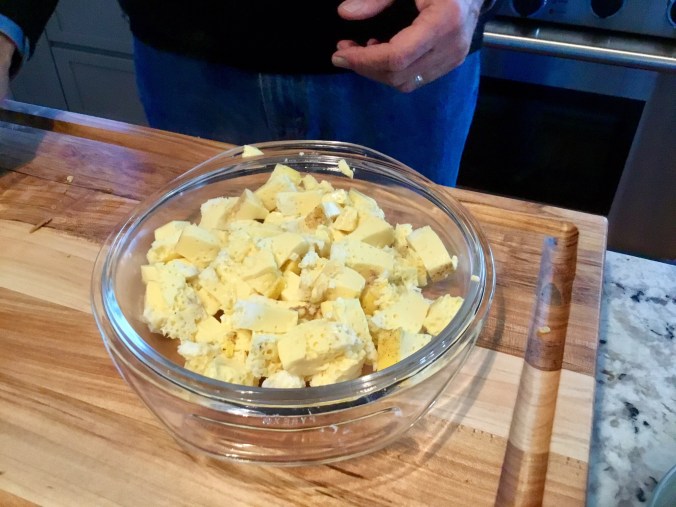
Eierstich is a combination of eggs and nutmeg, which is boiled in a bowl and chopped into cubes. These cubes give the soup a special and truly out-of-the-ordinary burst of flavor. You simply whisk the eggs with nutmeg, milk, salt, and pepper, and place the mixture in a small bowl. You cover the bowl with a plate that has a snug fit in the inner rim of the bowl:

img_0113

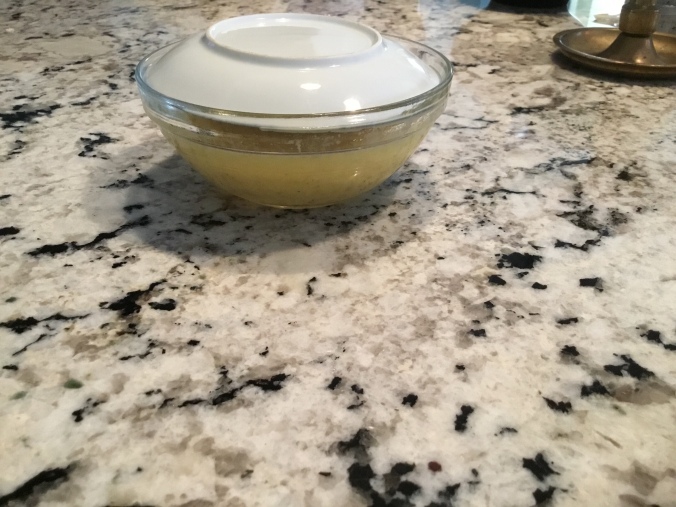
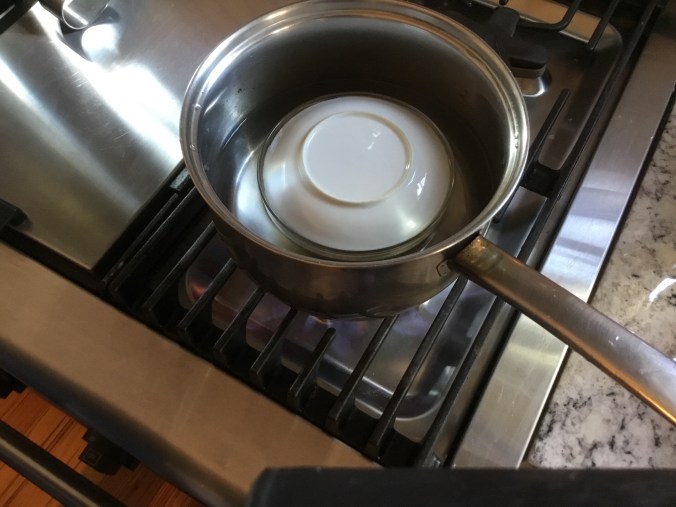
and then you place the whole thing in a pot with water. The water should go about 3/4 up the sides of the bowl. This is very gently simmered for 30 minutes, or until the eggs are fairly firm all throughout. You remove the solid piece of egg from the bowl and chop it up into cubes, and there you have it! Eierstich.

img_0115

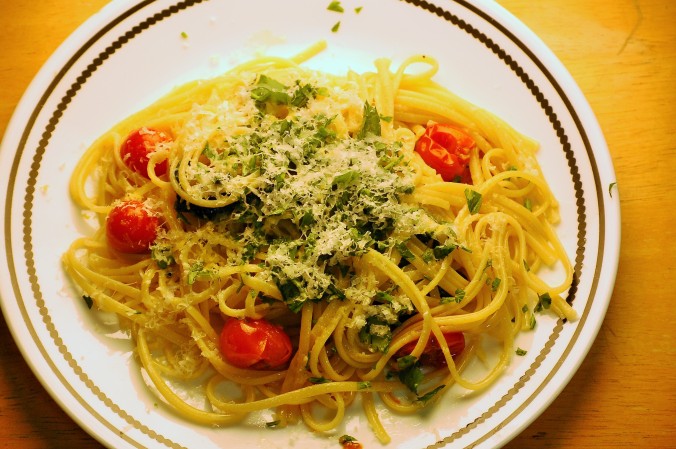
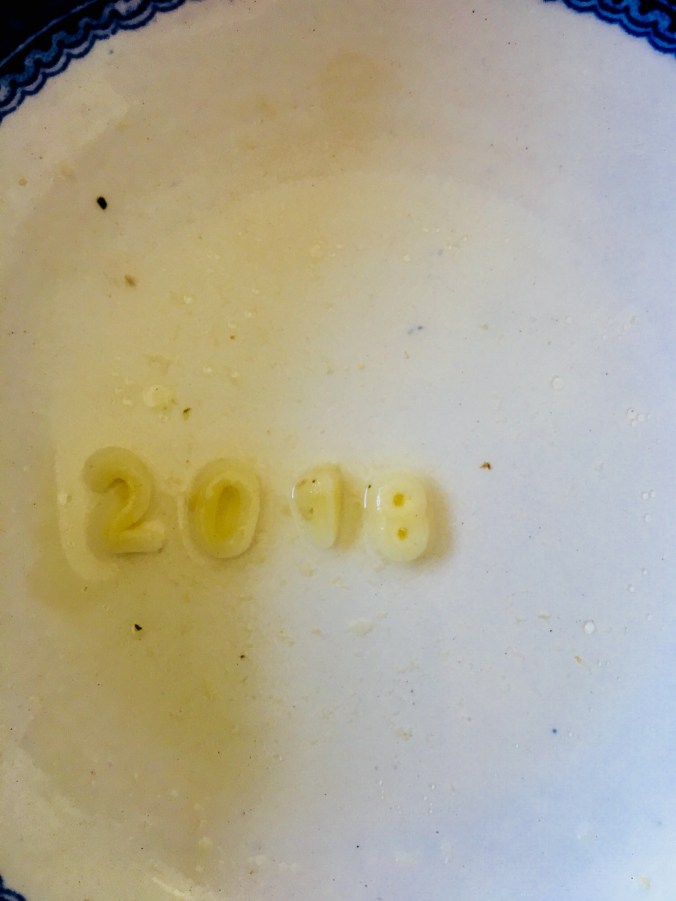
The soup also has white asparagus, scallions, and alphabet noodles. As a little kid I used to spend several minutes wading through the hot soup with a spoon, trying to find A-L-E-X so I could spell my name. A few years ago I spent about an hour finding all the noodles to spell everyone’s name so I could put it at the bottom of their soup bowl and it would serve as a name card of sorts. My creations were destroyed in a matter of seconds when we actually served the soup, but the little kid in me was pleased with my art project, and of course was pleased with this magical soup that can cure just about any ailment.

DSC_0750

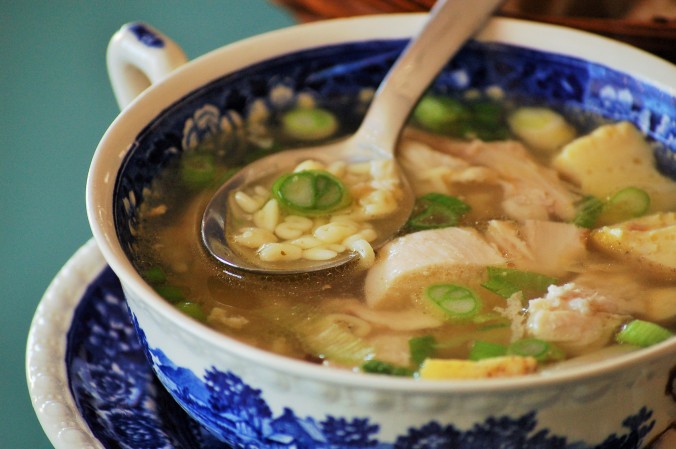
Happy New Year, from my soup bowl to yours! Wishing you all a year of health and happiness.

img_0274

Papa’s Chicken Soup

Serves 10

Ingredients:

  • 1 whole medium chicken (about 2 lbs), innards/giblets removed
  • 3 cubes chicken bouillon
  • 3 eggs
  • 1/8 tsp freshly grated nutmeg
  • 1/2 cup whole milk
  • 1 bunch scallions, chopped
  • 8 oz alphabet noodles
  • 1 (12 oz) jar white asparagus
  • Salt and pepper, to taste

Directions:

  1. Place the chicken in a large soup pot and cover completely with water. Allow the water to rise about an inch above the chicken. Cook the chicken over medium heat until the meat is tender and just starting to fall off the bones, about 1 hour 20 minutes (adjust as needed depending on the size of your chicken).
  2. While the chicken is cooking, prepare the Eierstich: Grease a small glass bowl with about a teaspoon of vegetable oil. Whisk the eggs, milk, nutmeg, and a generous sprinkle of salt and pepper in a medium bowl. Transfer the egg mixture to the greased bowl.  Cover the greased bowl with a plate that has a snug fit around the inner rim of the bowl. Place the bowl in a medium pot filled with enough water to go about 3/4 way up the bowl. Simmer the mixture, very gently over medium-low heat for about 30 minutes. The eggs should be relatively firm to the touch. Carefully remove the egg bowl from the pot of water and allow to cool for a few minutes.
  3. When the Eierstich has cooled, invert the bowl on a cutting board to release the egg mixture. Dice up the eierstich into 1-inch cubes and set aside.
  4. Cook the alphabet noodles in a medium pot of salted, boiling water until al dente, about 3-4  minutes. Drain the noodles, place them in a bowl, and toss them with a drizzle of olive oil to prevent them from sticking together. Set aside.
  5. Drain the white asparagus, reserving the juice from the jar. Slice the asparagus into roughly 1-inch pieces and set aside. Pour the reserved juice into the pot with the chicken while it is cooking.
  6. When the chicken has been cooking for about an hour, add the bouillon cubes into the pot. When the chicken is done cooking, remove it from the broth and place it on a large cutting board. Turn the heat down to low to keep the broth warm while you prepare the chicken.
  7. Carve the chicken meat off of the bones into fairly large chunks. Discard the bones and place the meat back into the broth. Add in the Eierstich and white asparagus pieces.
  8. To serve the soup, place a large scoop of alphabet noodles in the bottom of each bowl. Cover the noodles with several ladles of hot soup. Garnish with scallions and serve!


Cinnamon-Apple Stuffed French Toast with Whipped Vanilla Mascarpone & Cinnamon-Pear Balsamic Reduction


Strawberry Rhubarb Stuffed French Toast, meet your newest rival. Can you tell I have a sweet tooth with all these dessert posts lately?

I was asked to do a cooking demo at my beloved former job at Palmetto Olive Oil Company. Working there was a foodie’s dream. I got to help customers find the perfect olive oil or balsamic for whatever recipe they were looking for, snack on delicious bread with artisan olive oils all day, and expand my creativity in the kitchen with recipes like these. You know how I’m always going on about using the highest quality olive oil and balsamic you can find? Palmetto Olive Oil Company is where I go to find this stuff.

One thing you will notice about their balsamic vinegars is that they are aged for 18 years. They are sweet, thick, and luscious. Whenever I make a balsamic reduction with their product, it doesn’t take long at all to reduce and become even thicker and sweeter.

DSC_0718

Look at that beautiful mess. So let’s dive into what makes this French toast so special, shall we? It starts with lovely Challah bread, which is pillowy and light and looks like a little cloud awaiting its apple filling. Stuffed inside are granny smith apples that have been cooked down with butter, brown sugar, and just a pinch of salt– so basically, it tastes like the inside of an apple pie. The toast is griddled and finished off with a drizzle of cinnamon-pear infused dark balsamic vinegar, which adds a nice tang and more cinnamon flavor to reinforce the flavors of the toast. Finally, it’s all topped off with a combination of whipped cream and Mascarpone cheese, which gives it a silky, cheesecake-like flare. So basically, you’re looking at french toast meets apple pie meets cheesecake.

I tested this recipe at home before making it for the cooking demo, and in both cases people said “I’ll just take a bite…” and then ended up eating the whole plate. I think it’s safe to say this recipe is absolutely delicious.

DSC_0709

Cinnamon-Apple Stuffed French Toast with Whipped Vanilla Mascarpone & Cinnamon-Pear Balsamic Reduction

Serves 8

Ingredients:

For the toast:

  • 8 slices Challah or brioche bread, sliced roughly 1.5 inches thick
  • 3/4 cup half and half
  • 5 eggs
  • 1/4 teaspoon ground cinnamon
  • 1/2 teaspoon vanilla extract
  • Butter, for frying

For the filling: 

  • 4 granny smith apples, peeled and diced
  • 4 Tablespoons unsalted butter
  • 1 teaspoon ground cinnamon
  • 5 Tablespoons brown sugar
  • 1/8 teaspoon salt

For the whipped vanilla mascarpone: 

  • 1 cup heavy cream
  • 6 oz mascarpone cheese
  • 1 teaspoon vanilla extract
  • 4 Tablespoons confectioner’s sugar

You will also need 1/3 cup Cinnamon-Pear Dark Balsamic.

Directions:

  1. Make the filling: In a large frying pan over medium heat, melt the butter and add in the apples, brown sugar, cinnamon, and salt. Cook for 5-10 minutes, until the apples have softened and the butter and sugar have combined to form a caramel-like sauce. Set aside.
  2. Make the whipped mascarpone: In a large bowl, whip the heavy cream, vanilla, and powdered sugar until stiff peaks form. Add in the mascarpone cheese and beat until evenly combined. Set aside.
  3. In a shallow bowl, combine the eggs, half and half, cinnamon, and vanilla.
  4. Using a sharp knife, make a slit in the bottom of each slice of challah. This is the pocket where your filling goes. Stuff each slice with around 2 Tablespoons of filling.
  5. Dunk each slice of stuffed challah in the egg mixture. Make sure that each slice has a nice coating.
  6. Coat a griddle or skillet over medium heat with a few Tablespoons of butter. Fry the challah in batches of 2-3 in the skillet until golden brown.
  7. While the French toast is cooking, reduce the 1/3 cup of balsamic in a small saucepan over medium heat, about 3-5 minutes. It should thicken nicely.
  8. Top each slice of french toast with a drizzle of balsamic reduction and a nice dollop of the whipped mascarpone.


Dark Chocolate Cupcakes with Chocolate Ganache Filling & Salted Caramel Buttercream

DSC_0726.JPG

Oh man, I’m a little ashamed of how long it has been since my last post. But I brought a show-stopping cupcake recipe with me, so hopefully you will forgive me 😉 What can I say, the last semester of grad school is anything but slow.

2 weeks ago, I had the honor of making a dessert contribution for Sarah and Andy’s wedding. I wanted it to be something truly special that I knew they (and all the guests) would enjoy, so I came up with these decadent beauties.

DSC_0731.JPG

Sarah is one of the few people who understands chocolate on the level that I do. She may be my sister’s best friend, but she knows who to consult when she needs a chocolate fix! When she asked me to make a dessert for her wedding, I knew it had to be something sinful and chocolatey. Last year, I went through a stuffed cupcake phase. Well… Not as much of a phase as a permanent way of life. Once you stuff your cupcakes, you won’t go back. Case in point:

DSC_0740.JPG

I mean, COME ON. That chocolate ganache is basically a whole extra layer of love that moistens the cupcake and makes it feel like you’re eating a volcano cupcake. With homemade salted caramel buttercream. This is what dreams are made of, people.

Stuffing the cupcakes takes a little extra time, but it’s so worth it. All you have to do is take a sharp knife and, holding it at an angle, cut a small circle out of the center:

img_0043

Fill it with roughly 1-2 teaspoons of your filling:

img_0044

And then put the circle back on top to keep it a sweet surprise!

img_0045I made a small batch of these the night before the wedding and had the bride and my family do some quality control, just to make sure they tasted fine. The funniest reaction came from my Dad, who was basically losing his mind and swearing like a sailor because they tasted *that* good. As I was photographing them the next day before the wedding, he was lurking behind me: So, uh, Alex… We, uh, we gonna get any more of those or do they ALL have to go to the wedding? 

I haven’t even mentioned the frosting yet. Basically, it’s super rich and it has the perfect sweetness from the caramel to contrast the intensity of the dark chocolate cupcakes. A word of caution: I make my frosting with DRASTICALLY less sugar than most recipes. Most frosting recipes have 4+ cups of powdered sugar in them, and I think that makes them way too sweet. That being said, this frosting is best consumed the day of. Since there is less sugar, the frosting isn’t super stiff and it won’t last as long as most other buttercream recipes will. But good luck even making it to day 2 after you make these.

I’m so sorry the blog has been relatively quiet. I will try my  hardest to bring you thoughtful recipes and posts when I can. For now, enjoy these luscious cupcakes full of love, made for an occasion that was nothing but love! Congratulations Sarah and Andy!

DSC_0736.JPG

Dark Chocolate Cupcakes with Chocolate Ganache Filling and Salted Caramel Buttercream

Makes 24 cupcakes

Ingredients:

For the cupcakes*: 

  • 2 cups granulated sugar
  • 1 3/4 cup + 2 Tbsp all-purpose flour
  • 3/4 cups dark chocolate cocoa powder (I use Hershey’s Special Dark)
  • 2 tsp baking powder
  • 1 1/2 tsp baking soda
  • 1 tsp salt
  • 2/3 cup canola oil vegetable oil would also be fine
  • 1 cup milk
  • 2 eggs lightly beaten (preferably room temperature)
  • 2 tsp vanilla extract
  • 1 cup hot water (or hot coffee or 1 tsp instant coffee dissolved into 1 cup hot water)

For the ganache filling: 

  • 1 cup semisweet chocolate chips
  • 3/4 cup heavy cream

For the salted caramel buttercream: 

  • 2 sticks unsalted butter, room temperature
  • 1.5 Tablespoons salted caramel sauce (I use Trader Joe’s caramel sauce with Fleur de Sel)
  • 1/4 teaspoon sea salt
  • 1/2 teaspoon vanilla extract
  • 2 cups powdered sugar
  • 1 teaspoon heavy cream

Directions:

  1. Preheat oven to 350F and line muffin tin with cupcake liners (or lightly grease and flour).
  2. In large bowl, whisk together sugar, flour, cocoa powder, baking powder, baking soda, and salt.
  3. Stir in canola oil and milk, stirring until combined.
  4. Add eggs, one at a time, stirring after each addition.
  5. Stir in vanilla extract.
  6. Add hot water and stir until the mixture is evenly combined; it’s going to be a thin batter so don’t worry if you feel like it looks too runny.

  7. Fill prepared cupcake liners just over 2/3 of the way full and bake at 350F for 18-22 minutes. A toothpick inserted into the center should come out clean.
  8. Allow cupcakes to cool on a wire rack before filling and frosting them.
  9. While the cupcakes are cooling, make the ganache: Place the chocolate chips in a medium heatproof bowl. In a small saucepan, heat the heavy cream over medium-high heat, just before it boils (do not let it boil). Pour the hot cream over the chocolate chips and allow it to sit for 60 seconds. Stir the cream and chocolate mixture until it is silky and smooth. Set aside.
  10. Fill the cooled cupcakes by cutting a small circle out of the center (see above for picture tutorial) and placing 1-2 teaspoons of ganache in the center. Place the circle of cake you cut out back on top of the cupcake to close it off.
  11. Make your frosting: In a large bowl, beat the butter, caramel, powdered sugar, vanilla, salt, and cream until the ingredients are evenly combined and the mixture is light and fluffy.
  12. Place the frosting into a pastry bag and pipe onto the stuffed cupcakes.
  13. ENJOY!

*Note that the cupcake recipe is an adaptation on Sugar Spun Run’s Easy Chocolate Cupcakes. 

Hazelnut Cinnamon Rolls with Cream Cheese Frosting

DSC_0718

I LOVE a good cinnamon roll. I am always on the hunt for the most perfect one– soft, warm, and a tangy cream cheese frosting. None of this clear glaze business. When I have a cinnamon roll, it better be loaded with delicious cream cheese. It’s so hard to get the good ones unless you go to an excellent bakery. So the other day when I knew a sweet friend of mine was having a birthday, I  had the perfect excuse to make cinnamon rolls my way. And that included a surprising addition of hazelnuts, because why not?

People, I am craving these again already, and I just made them last week. I woke up this morning and all I could think about was these delicious beauties. I have to make them again soon! I used to be so intimidated by making homemade breads and  pastries from scratch, but it really isn’t that hard if you have patience!

DSC_0717

There is nothing like the sight of cream cheese frosting melting into a hot, fresh batch of cinnamon rolls. These are an adaptation of Nancy Fuller’s recipe. I changed them up by doing hazelnuts instead of pecans, and I put way less sugar in the frosting. I always find that I can cut over half of the sugar in most frosting recipes and it’s still quite sweet. I find that in particular the sweet brown-sugary filling in these cinnamon rolls calls for a tangier cream cheese frosting to balance it all out. And psst… You don’t have to have a standing mixer or dough hook to make these. You have to get your hands a little dirty and you get quite an arm workout in the process, but the payoff is totally worth it.

They certainly aren’t the most perfectly shaped cinnamon rolls. But that’s how you can tell that they are homemade and all the more amazing. The other thing I love about these is that you can keep the leftover rolls in the fridge, pop them in the microwave for 20-30 seconds when you want one, and they taste like they are hot out of the oven all over again. It’s absolutely glorious!

DSC_0722

Hazelnut Cinnamon Rolls with Cream Cheese Frosting

Makes around 12 rolls 

Ingredients:

For the dough– 

1 package (2 1/4 teaspoons) active dry yeast

3 cups all-purpose flour, plus extra for dusting your work surface

2 Tabelspoons butter, melted, plus extra for greasing the baking dish

2 Tablespoons granulated sugar

1/2 teaspoon salt

1 egg, lightly beaten

For the filling– 

1 cup hazelnuts, roughly chopped

1 cup packed dark brown sugar

2 teaspoons ground cinnamon

1/2 teaspoon salt

1 stick (8 Tablespoons) unsalted butter, melted

For the cream cheese frosting– 

6 oz cream cheese, softened

1/2 cup powdered sugar

splash of vanilla extract (perhaps a teaspoon?)

2-3 Tablespoons whole milk

Directions:

  1. Make your dough: Place the yeast and 1 cup of room temp water in a large bowl and whisk vigorously to combine. If you have a standing mixer and dough hook, add in the flour, butter, salt, sugar, and egg to the bowl and knead on medium-low speed until the dough forms a ball and easily releases from the side of the bowl (about 4 minutes). If you do not have a dough hook and standing mixer, flour your hands and brace yourself for a mess. Add in the flour, butter, salt, sugar, and egg to the bowl and combine. Use your hands to knead the dough until it forms into a ball, about 10 minutes.
  2. Butter a large bowl. Transfer the dough to the bowl and cover with a clean kitchen towel. Set aside in a warm spot in your kitchen and allow the dough to double in size, about 1.5 hours.
  3. Preheat the oven to 375 degrees. Butter a 13 x 9 glass baking dish.
  4. For the filling: In a medium bowl, combine the chopped hazelnuts, brown sugar, melted butter, salt, and cinnamon. Set aside.
  5. Flour a large work surface. Punch down the dough in the bowl and transfer it to the work surface. Roll the dough into a 16 x 12 inch rectangle. Spread with the filling, leaving roughly a 1/2 inch border.
  6. Starting at one of the short ends, roll the dough into a cylinder and then slice into 12 rolls. Arrange the rolls, cut-side up, in four rows in the prepared baking dish. Cover with a clean kitchen towel and leave to rise in a warm, draft-free spot until nearly doubled in volume, about 45 minutes. Uncover and bake until golden on top, about 20 minutes.
  7. While the rolls are baking, make the frosting: In a medium bowl, combine the cream cheese, sugar, and vanilla. Beat until combined, and slowly add in 2-3 Tablespoons of milk until you’ve reached your desired consistency. Spread the icing over the warm rolls shortly after they come out of the oven.

*Note: Recipe adapted from Nancy Fuller’s Gooey Cinnamon Buns: http://www.foodnetwork.com/recipes/nancy-fuller/gooey-cinnamon-buns-with-thick-cream-cheese-icing-3337729


Eric’s Pasta

DSC_0732.JPG

Remember my first blog post when I said that I have variations on garlic pasta? The version I am sharing today is Eric’s personal favorite. So much so that he generally begs me to make this variation of garlic pasta any time he knows it’s on the week’s menu. It’s a simple dish, and it’s light but still savory and delicious. The sauce is a simple base of olive oil and garlic, with cherry tomatoes and a Parmesan rind added to the mix. The tomatoes start to blister in the pan and release some of their juices while the Parmesan rind melts down and adds a salty, silky touch to the sauce. Fresh spinach and lemon zest are thrown in at the end and it’s all tossed with the hot linguine and some pasta water to bring it all together. Topped with fresh parsley and more Parm…Yum!

DSC_0735.JPG

I came up with this recipe one of the first times I went to visit Eric at USC. We did long distance all throughout college and whenever I would visit him in the dorms, we had limited resources. I quickly grew tired of dining hall  options. I wanted something cheap, clean, and easy to make in a tiny communal dorm kitchen. Freshman Eric was skeptical of tomatoes, and this is the dish that totally changed his mind. I have already discussed this in other posts, but I shall reiterate: blistered tomatoes are the bomb. They become sweet little jewels and they totally change the texture and taste of boring old tomatoes. I particularly love this dish because while the tomatoes are cooking in the olive oil, I take a spoon and smash some of them just to get that extra sweetness into the sauce. I also love the final touch of lemon zest, which might seem a little strange with the other ingredients but it really brightens up the dish and makes it taste so clean and fresh.

If you don’t have a Parmesan rind on hand, that’s fine. Personally I store them in the freezer because we go through a lot of Parmesan. The rinds are super handy to throw into soups and pasta sauces. If you haven’t been saving your rinds, you don’t know what you are missing!

If you’re a meat eater and you want something heartier for this meal, you could easily serve it alongside some chicken. Personally, I think this pasta makes for the perfect light dinner or lunch. It’s even better leftover!

DSC_0734.JPG

Eric’s Pasta

Serves 4 

Ingredients:

1 lb linguine pasta


7 cloves garlic, minced

1/2 cup extra virgin olive oil

1 Parmesan rind (optional)

1 pt cherry tomatoes

1 (6 oz) package fresh spinach

Zest of one lemon

Fresh Parmesan and Italian Parsley, to go on top


Directions:

  1. Cook the linguine in heavily salted water until al dente. It is ideal to use tongs to transfer the noodles directly into the sauce, so you will want to have the sauce ready by the time the pasta is cooked.
  2. While the pasta is cooking, heat the olive oil in a deep pan over medium heat. Add the minced garlic and cook until softened and fragrant, around 3 minutes. Add in the cherry tomatoes and Parmesan rind and turn the heat up to medium-high. Season the tomatoes with salt and pepper. Gently shake the pan throughout cooking and allow the tomatoes to blister and sweeten, around 8-10 minutes. Add in the spinach and lemon zest and stir until slightly wilted. Remove whatever is left of the Parmesan rind.
  3. Directly transfer the pasta from the pot to the pan with the sauce (If you are unable to do this, simply drain the pasta and quickly add it to the sauce pan). Add in a splash of pasta water and stir everything to combine.
  4. Top each plate of pasta with a healthy sprinkling of fresh Parmesan cheese and fresh chopped Italian parsley.


Chickpea Caesar Salad with Lemony Thyme Breadcrumbs

DSC_0705.JPG

Oh blog, how I have missed you! It’s only been one week, but I hate that I missed my 2 posts-per-week mark. Alas, the Fall semester is back in full swing and that’s just what happens when you are working on your Master’s and a food blog at the same time. Luckily I only have a few more months to go before this grad school journey has come to an end. I’m hoping to get into a new routine to keep the blog consistent, but things might get a little hectic this semester.

In other news, Eric and I moved to an adorable farm for our last four  months up in the mountains. We eat dinner every evening outside joined by the company of a sweet white lab, a cat, and a goat. You could say I’m in heaven. When I take my veggie scraps to the compost every day I save some scraps for Crook (named that because he has a crooked neck due to scoliosis), the goat who acts like a dog and comes to you when you call him. Life has been quite good lately.

DSC_0702.JPG

Today I’m sharing a chickpea Caesar with the most amazing breadcrumbs ever. The breadcrumb idea is an adaptation of my Aunt Donna’s lemon-thyme breadcrumbs, and let me tell you they are simply fabulous. I used up a stale baguette I had lying around the house, seasoned it with fresh thyme, lemon zest, and Parmesan cheese. The result is these bright crunchy cubes of deliciousness. I would say that the chickpeas are the star of the salad, but I’m not ashamed to admit it’s really the breadcrumbs. I may have had some self-control issues as I was dividing them not-so-evenly among the salad plates. And you know what I did with the leftovers? Rolled them all in a big flour tortilla for a delicious lunch wrap. Ohhhhh yes.

DSC_0707.JPG

I love a good Caesar salad. It’s so savory and salty, and it has such a nice richness that not a lot of salads can offer. I had the idea to add chickpeas because they are my go-to for vegetarian protein substitutions. They are lightly seasoned with paprika, garlic powder, and thyme and then crisped up in some olive oil. If you’re not a vegetarian and you wanted to make this salad with chicken, I’m sure it would work very well in place of the chickpeas.

I’m sorry for the lack of posts last week, but hopefully you can make this salad soon and all will be forgiven after you taste it!

DSC_0703.JPG

Chickpea Caesar Salad with Lemony Thyme Breadcrumbs

Serves 4 

Ingredients:

2 cans chickpeas, drained and rinsed

5 Tablespoons olive oil

1/4 teaspoon paprika

1/4 teaspoon Herbes de Provence

1/2 teaspoon garlic powder

2 heads Romaine lettuce, chopped

Fresh Parmesan, for shaving over the top (roughly 1/4 cup over each salad)

1 batch Caesar Salad Dressing

For the lemony thyme breadcrumbs– 

2 cups cubed stale bread

1 heaping Tablespoon Parmesan cheese

1/2 teaspoon lemon zest

1 teaspoon fresh thyme, chopped

2 Tablespoons olive oil

Directions:

  1. Make the breadcrumbs: Preheat the oven to 350 degrees. In a medium bowl, combine the bread cubes, thyme, lemon zest, Parmesan cheese, and olive oil until all the cubes are nicely coated. Lay the bread cubes in a single layer on a cookie sheet and bake in the preheated oven for 10 minutes, shaking the cubes around halfway through the cooking time. Set aside.
  2. In a large pan over high heat, add the 5 Tablespoons of olive oil and heat until the oil is shimmering. Add the chickpeas to the oil and season with the paprika, garlic powder, Herbes de Provence, and salt and pepper (to taste). Allow the chickpeas to crisp up in the oil, about 8 minutes or so. Remove from the heat and allow to cool slightly.
  3. Divide the romaine evenly between the plates. Top each bed of lettuce with chickpeas, freshly shaved Parmesan, and a healthy drizzle of the Caesar dressing. Top with breadcrumbs and serve.


Portobello “Cheesesteak” Sandwiches

DSC_0711.JPG

I have never been to Philadelphia and I know nothing about what constitutes a true Philly cheesesteak. I do know that I absolutely love my creation of a vegetarian cheesesteak, whether or not it approximates the authentic Philly style version.

This sandwich is So. Savory. So cheesy. So rich and flavorful! The portobellos are sauteed in butter with a little bit of soy sauce to give them that meaty, savory element. The cheese sauce is a combination of sharp cheddar and cream cheese, so it has a nice tang to it. Sauteed peppers and onions give you that sweet veggie flavor to balance out all that richness. Oh, and the whole thing is nestled within an herbed garlic butter baguette. Oh yes, you read that right. This sandwich is a vegetarian dream.

You’re going to want to know that this is not exactly a light sandwich. My favorite way to cook mushrooms is in an ample amount of butter. And then there is garlic butter on the bread. And then there is a creamy cheese sauce drenched over everything. But hey, a cheesesteak isn’t exactly health food. It’s an indulgent sandwich that makes you feel like you’re eating fast food. But it’s so much better when it’s homemade!

I’m going to shamefully admit that I did not get a lot of good pictures for this post. The reason being that I hadn’t had breakfast and was dreaming up how I was going to make these sandwiches all morning. When lunch finally rolled around, I was so hungry and my mouth was watering by the time they were done and well… I just didn’t last very long through the photo shoot. This just means you are going to have to try these out yourself to really get a good idea of what they taste like.

DSC_0716.JPG

Portobello Cheesesteaks

Serves 4 

Ingredients:

1 baguette loaf (for this sandwich a slightly softer loaf is preferred)

4 large portobello mushrooms, thinly sliced

2 teaspoons soy sauce

1 medium yellow onion, thinly sliced

1 green bell pepper, cut into thin strips

1 Tablespoon olive oil

10 Tablespoons butter, divided (4 Tablespoons need to be room temperature)

1 clove garlic, minced

1/4 teaspoon dried oregano

1/4 teaspoon dried basil

1/8 teaspoon crushed red pepper flakes

2 Tablespoons all-purpose flour

1 cup whole milk

4 oz sharp cheddar cheese, grated

2 oz cream cheese

Directions:

  1. Preheat the oven to 350 degrees.
  2. In a medium skillet, heat the olive oil over medium-high heat. Add the sliced onions and peppers, season with salt and pepper, and cook until they start to get some color and are completely soft, about 6-8 minutes. Set aside.
  3. Divide the baguette into 4 segments. Cut open each segment like a book (not cutting all the way through).
  4. Combine the softened 4 Tablespoons butter with the minced garlic, oregano, basil, and red pepper flakes. Spread the butter mixture inside each baguette segment. Place the segments on a cookie sheet and bake in the preheated oven for 10 minutes.
  5. In a medium skillet over high heat, melt 4 Tablespoons of butter. Add the sliced portobellos in an even layer and do NOT stir. Allow them to get some nice color on one side before stirring them around. When they have sat in the hot butter for 3-4 minutes, stir and continue to cook for another 3-4 minutes. If the skillet starts to look dry, drizzle in olive oil as needed. When the mushrooms are almost done, add in the 2 Tablespoons of soy sauce and freshly cracked pepper. Stir, turn off the heat, and set aside.
  6. To make the cheese sauce: in a small pot, melt remaining 2 Tablespoons butter over medium heat. Slowly whisk in the 2 Tablespoons of flour and cook for 2 minutes, or until the flour and butter are nicely incorporated. Slowly whisk in the milk and continue to whisk until the mixture is nice and thick, about 5 minutes. When the mixture has thickened, turn off the heat, add in the cheddar and cream cheese, and stir until cheese is completely melted.
  7. To assemble the sandwiches, divide the pepper and onion mixture as well as the sauteed mushrooms evenly between each baguette segment. Smother each sandwich with desired amount of cheese sauce.

Strawberry Basil Ricotta Toasts

DSC_0700.JPG

I believe that something magical happens when you heat fruit in a saucepan. It breaks down the fruit and turns it into a luscious, sweet, compote that tastes like the inside of a pie.

Sometimes I want a sweet breakfast without having to fuss over the stove or oven all morning to make cinnamon rolls or pancakes or what have you. This ricotta toast is so simple and yet so satisfying! Creamy vanilla ricotta, sweet  and warm strawberries with a touch of basil to give it something fresh and unique, and toasted almonds. That’s it!

One of the things I love about Italian cheeses are their versatility. It is so awesome to use ricotta or marscapone cheese in a sweet dish one day, and then in a savory dish the next. No matter what, you get that silky creaminess and tang from the cheese, but you can add whatever spices you want to change it up and work for your dish. If I can find a way to use cheese in my desserts or sweet breakfasts,  you better believe I’m going to do it.

DSC_0704.JPG

I would like to make a side note that the only reason the bread is cut slightly crooked is because it was literally still warm from the bakery when I picked it up and brought it home. Have you ever tried to cut fresh bread? It’s a little challenging. But the freshness it brought to the dish was worth it!

This is a really simple dish that once again looks impressive but is truly a cinch to throw together. Instead of offering a guest regular toast for breakfast, you can serve something like this and it just makes it extra special. You could also change it up if strawberries aren’t your favorite. I’m sure peaches, apricots, or blueberries would make excellent substitutions here! Personally, I find that strawberries and cream are a match made in heaven. When the juices from the warm strawberries start to melt into that creamy ricotta you kind of feel like you are eating a strawberry shortcake. For breakfast. I mean, what more could you want?

DSC_0706

Strawberry Basil Ricotta Toasts

Serves 2 

Ingredients:

2 slices thick-cut bread, toasted

1/2 lb strawberries, trimmed and sliced

1 Tablespoon water

1 Tablespoon granulated sugar

1 heaping Tablespoon fresh chopped basil

1/2 cup whole-milk ricotta cheese

1/2 teaspoon vanilla extract

1 Tablespoon powdered sugar

3 Tablespoons sliced almonds, toasted in a dry skillet

Directions:

  1. In a small saucepan, heat the strawberries, granulated sugar, water, and basil over medium heat. Cook for 8-10 minutes, or until the strawberries have broken down and the sauce has thickened slightly. Turn off the heat and set aside.
  2. In a small bowl, combine the ricotta, powdered sugar, and vanilla. Mix to combine and spread on top of the slices of toast.
  3. Top each ricotta toast with the strawberry mixture and the toasted almonds.


German Plum Cake (Zwetschgendatschi)

Use.JPG

One of the many reasons I love Germans is that they regularly eat coffee and cake in the afternoon (well, at least all of our friends do). I may or may not gain a few pounds after spending time in Germany simply because I eat so much cake. German-style cakes are simply fabulous! They are not as sweet as American cakes, and they tend to use lots of nuts and fresh, seasonal fruits. A late summertime favorite in Bavaria is plum cake, or Zwetschgendatschi.

use 2.JPG

DSC_0691.JPG

Someone  was super interested to see what all the fuss was about while I was photographing the cake. He was extremely disappointed when I told him he couldn’t have a piece. I almost gave in though, because… that face! What a cutie pie.

The first time I took Eric to Germany, he was kind of surprised at how frequently we consumed cake and coffee. Walking around new cities, rather than going to museums, we often scoped out the best bakery we could find and stopped for cappuccinos and cake. Walked some more. More coffee. Maybe more cake. Hey, when you vacation with a Stromberg, the main event of any destination is the food. What can I say?

use1.JPG

My mom and I adapted a recipe we had been using online for years and created the plum cake I’m sharing today, which is a little different from the traditional German-style cake. We added walnuts to the crust, which give it a nice nutty flare. Cinnamon and sugar on the top of the cake provide a final kiss of sweetness and warmth, making this cake just divine. The plums are packed in very tight rows along the buttery crust, ensuring that no bite goes plumless. Served with a healthy dollop of fresh whipped cream, it just can’t be beat. (Side note: Germans are not afraid to really go heavy on the whipped cream. The cake has a lot less sugar than your average cake, so treat yourself to some extra calories with all that glorious whipped cream 😉 ) Not to mention, who expects plum cake? It’s so unusual in the States. I grew up eating plum cake on the regular on hot, August afternoons.

I went to an international high school, and we often did giant potlucks a few times a year when the entire lunch table became a sort of mini-international festival, boasting food from around the globe. When I would whip out this little plum cake, my fellow Germans at the table would squeal with delight.

I hope you can try out this plum cake and get a taste of a German favorite.

use def

German Plum Cake (Zwetschgendatschi)

Serves 6-8

Ingredients

1 cup plus 3 Tablespoons all-purpose flour

1/2 cup walnuts, finely ground in a food processor

1 stick plus 2 Tablespoons salted butter, softened

6 Tablespoons granulated sugar, divided

1 egg yolk

1 lb small, black plums

1 teaspoon cinnamon

Fresh whipped cream, for serving

Directions:

1. Preheat the oven to 375 degrees.

2. In a medium bowl, combine the ground walnuts, flour, butter, and 5 Tablespoons of the sugar. Mix with your hands until a soft dough forms. Add the egg yolk and mix with your hands until the dough is coming off the sides of the bowl.

3. Press the dough evenly into a 9″ x 13″ baking sheet.

4. Slice each plum in half, remove the pit, and slice each half into 4 slices. Arrange the plums in tight rows on top of the crust so the slices are standing up (skin side down). Sprinkle the cake with the cinnamon and the remaining sugar.

5. Bake the cake in the preheated oven for 25 minutes. Allow to cool slightly and serve with fresh whipped cream.

*Note: Recipe adapted from http://www.cooks.com/recipe/ul6z47xx/german-plum-cake.html


Dijon & Herb Crusted Salmon with Creamy Leeks and Crispy Potatoes

DSC_0705.JPG

If you are looking for a fancy yet easy complete meal for your next date night, this is it. It was another one of those dishes that I had out at a local European restaurant and just had to figure out how to recreate it at home. My Mom appears to have figured it out! She’s been making this dish for roughly a year now, and it’s about time I got around to blogging it. It’s a five-star meal loaded with flavor, but it’s so simple to make.

I love the balance of textures going on in this dish. You’ve got a layer of ultra-crispy potatoes on the bottom, topped with a layer of creamy leeks, followed by tender salmon with grainy mustard and a crunchy topping. It’s to die for! I don’t eat fish very often, but I’ll make an exception for this dish because it’s just too good.

It’s been a bit of a rough week having to only eat soft foods since my oral surgery. I felt like a puppy sitting at the table, longingly staring at everyone else’s plates while I ate overcooked Mac ‘n’ cheese and smoothies. Luckily, I’m almost back to normal! Crunchy foods, I’m coming for ya (soon). Can I also say, WHY do people feel the need to share with me everything that went wrong during/after their oral surgery procedures?! I went to a cooking class last night and I told one of my fellow classmates that I just got my wisdom teeth out. His response was “Not to scare you or anything, (at which point I should have told him to  stop talking), but when I got mine out they healed up just fine and then a week later I got an abscess and my whole neck swelled up and it was a whole thing and $2000 I’m still dealing with the aftermath.” Gee, thanks. I’m glad you shared your completely non-helpful tidbit about the horror following your surgery. Here’s hoping that doesn’t happen to me!

DSC_0697

Ok, sorry for that little tangent. Just know, if you had a bad experience following a medical procedure, it’s probably best not to tell someone who just had said medical procedure done.

…But back to the food. The reason you’re here reading this. When I do splurge to eat fish, I like to get the highest quality, most sustainable fish I can get. The salmon used in this recipe was wild Alaskan Coho Salmon, and I would definitely recommend the Coho over Sockeye, if you can find it.

Disclaimer: This recipe is easy, but it uses quite a few pots and you have to attend to each component of the dish. I would highly recommend reading through the entire recipe before starting so that you can have your prep work done and make it a less stressful event!

DSC_0690

Dijon & Herb Crusted Salmon with Creamy Leeks & Crispy Potatoes

Serves 4

Ingredients:

2 lb Wild Alaskan Coho Salmon

1/2 cup grainy dijon mustard

1 1/2 cups panko bread crumbs

3 Tablespoons olive oil, divided

2 Tablespoons chopped fresh Italian parsley

Zest of one lemon

For the potatoes–

2 large potatoes, diced

2 Tablespoons butter

For the leeks– 

2 leeks

2 1/2 Tablespoons butter

2 Tablespoons flour

1/2 teaspoon freshly grated nutmeg

1 1/2 cups whole milk

Directions:

  1. Preheat the oven to 350 degrees.
  2. Slice the leeks in thin rounds and place in a medium bowl. Fill the bowl with water and allow the leeks to sit for a few minutes, to allow any gritty material to sink to the bottom of the bowl. Drain and set aside.
  3. To make the potatoes: In a medium skillet over medium-high heat, fry the potatoes in the butter and season with salt and pepper, stirring only occasionally, about 15 minutes. Set aside.
  4. To make the creamy leeks: In a small pot over medium heat, melt the 2.5 Tablespoons butter. Slowly whisk in the flour and allow to cook for 2-3  minutes. Add in the milk and fresh nutmeg, as well as salt and pepper. Allow this mixture to simmer for 10-15 minutes, until thick and creamy. Throw in the sliced leeks and allow to cook for another 1-2 minutes. Turn off the heat and set aside.
  5. While the leeks are cooking, cut the salmon into 4-5 pieces. Divide the mustard evenly between the salmon pieces and smear a generous amount on the top of each piece.
  6. In a small bowl, combine the panko bread crumbs, 1.5 Tablespoons of the olive oil, lemon zest, and chopped parsley. Divide the crumb mixture evenly between the salmon pieces and firmly press the crumbs into the top of each piece. Season with salt and pepper.
  7. In a large, oven-safe skillet over medium-high heat, fry the salmon (skin side down) in the remaining 1.5 Tablespoons of the the olive oil for 10 minutes.
  8. Transfer the skillet to the preheated oven and bake the salmon for 12 minutes. Then, turn the broiler on high and broil for 3-5 minutes, but check frequently to make sure the salmon isn’t burning!
  9. Serve each plate with a base of crispy potatoes topped with the creamy leeks. Top this with a piece of salmon and a lemon wedge.